Free Keto Meal Plans!

Ok, so not EVERYONE on keto eats bacon and eggs, but it can be a perk!

Sign up for my mailing list to get free access to 2 keto meal plans with recipes!

[et_bloom_locked optin_id=optin_4]

1500 Calorie (ish) Keto-Pescatarian Meal Plan

MEAL #1
Keto Cereal (Click here for keto cereal recipe)
1/4 cup mixed berries
2 tbsp coconut cream
Top cereal with berries of choice
Use coconut cream in coffee/tea
*Scoop thick cream off of a can of full-fat coconut milk (Thai brand)

MEAL #2
3 whole large eggs
50 g smoked salmon
1 tbsp olive oil or mayo
2 cups  spring mix
6 cherry tomatoes
Optional veggies

Make eggs/salmon into an omelet/scramble/egg muffins. Use oil to dress salad or saute egg/veggies.   Add lemon/lime/vinegar to dressing!
Try topping with salsa/hot sauce for more flavor and variety, trace carbs.

MEAL  #3
5 oz  Firm Tofu
50 g avocado
2 cups zucchini
Optional veggies

Grill or pan fry tofu with seasonings of your choice.                                                                                                          Make zucchini into noodles and create a sauce by blending avocado/lemon/spices, so yummy and great hot or cold!

MEAL #4
3 tbsp chia seeds
1 cup sf cashew milk

Make into a chia pudding for dessert.                                                                                                                                 Mix together with stevia/cinnamon/vanilla/cocoa (your choice!) and let sit in fridge to thicken 2-3 hours or overnight.

Devour!

Optional: 10 g net carb fromadditional veggies of your choice

Totals:  79 protein, 20 net c (67 total, 47 fiber), 124 fat (5% c, 21%p, 74% f)
(1512 calories total)

1500 (ish) Calorie Keto Meal Plan

MEAL #1
1 whole large egg
2 slices cooked bacon
2 cups spring mix
1 tbsp coconut oil

Make bacon/eggs into omelet/scramble/egg muffins or hard boil/cook in advance. Use oil for dressing or blend into a.m. coffee!

MEAL #2
3 oz boneless skinless chicken thigh
100 g avocado
1 tbsp olive oil
15 g sunflower seeds
200 g romaine lettuce
1/2 cup cucumber
1 oz red onion

Salad! Mix together with spices, vinegar or lemon, etc. for a super satisfying fat-fueled salad. Avocado can be blended with vinegar/citrus to make a creamy, dairy-free dressing.

*Protein is cooked measurements

MEAL  #3
3 oz extra lean ground beef
1 cup spaghetti squash
1 tbsp olive or coconut oil

Make into meatballs/patties or pan fry with squash/spices for “meat sauce.” Add salsa, hot sauce, etc.

MEAL #4
2 PB Cookies (Click here for PB cookie recipe)
15 g coconut butter
1 cup SF cashew milk

Top with coconut butter, & wash it down with cashew milk (try adding stevia/vanilla for a creamy sweet treat, so nice!)

Enjoy!

Optional: 10 g net carb from additional veggies of your choice

Totals:  79 protein, 29 net c (53 total, 24 fiber), 122 fat (7.2% c, 21%p, 71.8% f)
 (1530 calories total)


What If These Macros Aren’t Right For Me?

Obviously 1500 calories isn’t going to be right for everyone, but I think this is a good middle ground that is easy to adjust depending where you need to be.

If you’re eating LESS than this, your calories are probably going to be adjusted in terms of fat.

Take some oils out and voila, your fat macros will be lower.

If you’re eating MORE than this, you’re likely going to adjust both protein and fat up.

This is easy, increase your protein serving sizes and add some extra fat via things like bullet proof coffee, homemade dressings, nuts/seeds, etc.

This is a great starting place that can be easily adjusted to work for you!

If you’re not even sure WHERE to start with macros, first start by figuring out your calorie intake based on your goals (there are lots of online calcs for this), then figure out what ratio of protein/fats/carbs is right for you.

I generally recommend a break down of around 70-75%  fat, 20% protein, and 5% carbs as a starting point for keto and adjust from there.

Remember to ensure you’re getting lots of water and balancing your electrolytes through added salt/minerals when adjusting to keto to avoid the “keto flu!

I hope you love these keto meals as much as I do.

Don’t forget to tag me in your recipes @kyfitnessandnutrition and let me know if you have questions!

[/et_bloom_locked]


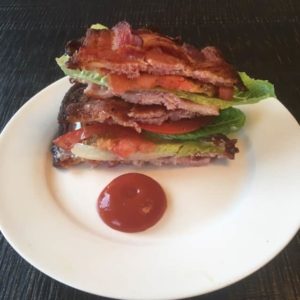
Bread-Less BLT | KETO BLT | LOW-CARB BLT (gluten free, dairy free, keto friendly) : Bacon Weave

BLT for breakfast, but with no carbs?

I’m in.

I’ll be honest, I was a bit skeptical about how this would turn out, the whole “bacon for bread” thing.

But it couldn’t have worked out better and I seriously didn’t miss the bread!

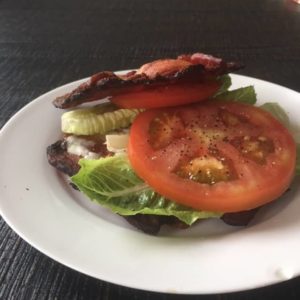
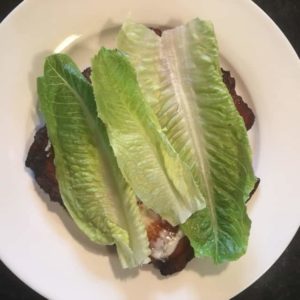
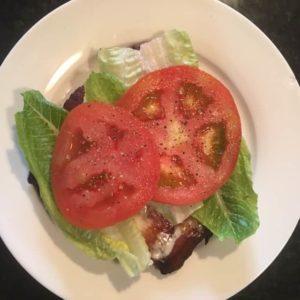
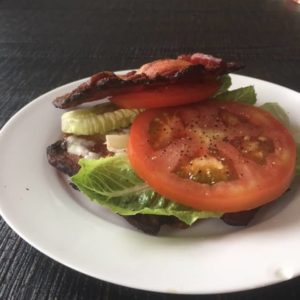
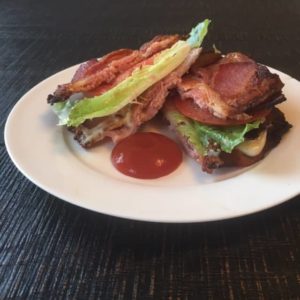
Isn’t it a thing of beauty?

The best part is that it’s much lower in calories than I originally expected despite the fat content

(nutrition information at the bottom!)


Ingredients:

-3 to 6 slices of bacon (6 if you want top and bottom “bacon bread”)

-tomato

-lettuce

-mayo (I use Kind Condiments homemade mayo)


Directions:

We start by making a bacon weave for our “bread” if you don’t know how to do this I’ll walk you through it!

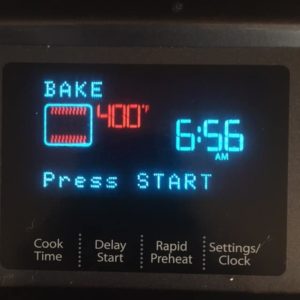
1.Start by pre-heating  your oven to 400 degrees


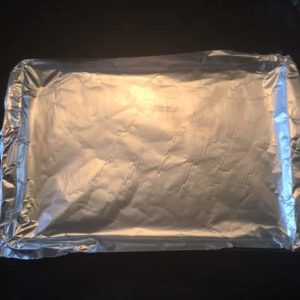
2. Cover a baking sheet in foil for easy cook/clean up (or put a baking rack on top of a pan instead)

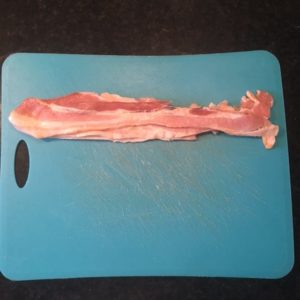
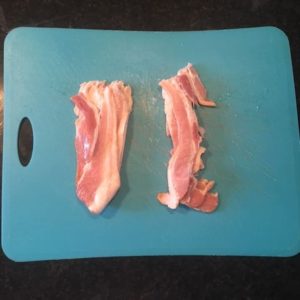
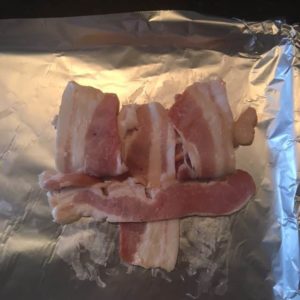
3. Lay your bacon strips out and cut them in half

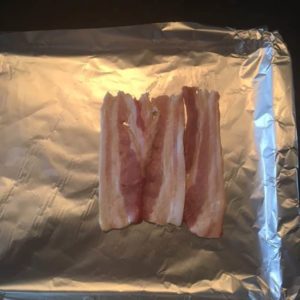
4. Place 3 of your now 1/2 length bacon strips side by side

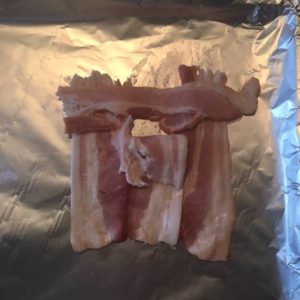
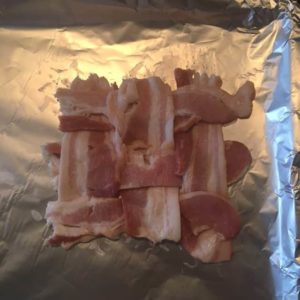
5. Peel back the top of the middle strip into the middle of itself and add another strip horizontally (covering the top portion of the outer two strips) and then fold it back to lay flat

6. Now take the bottom end of the outer 2 strips and peel them back, folding them to their middle, adding another strip horizontally across, overlapping the middle strip

7. Replace the outer two strips, laying them flat over the slice you added across the middle and repeat the weave process once more to add a final strip across the bottom by folding up the middle strip and overlaying 1 more piece.

All together you will have used 3 whole slices of bacon (6 halves) to create a bacon weave that becomes your “bread!”

If you want top and bottom bread repeat this process again using another 3 full strips of bacon.

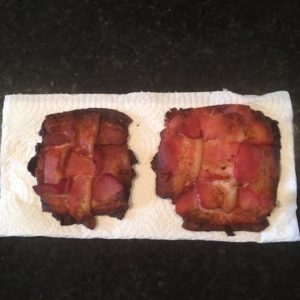
8. Once your weave(s) complete throw it in the oven for 25-30 minutes or until cooked through to your liking

9. Remove from the oven and  let sit on paper towel to drain excess oil

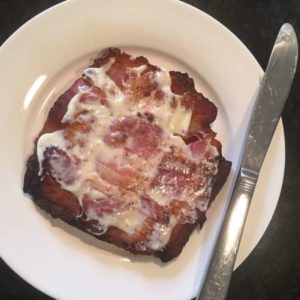
10:  Once moderately cool, top with mayo of choice (*cough* Kind Condiments *cough*)

11. Then the L (I used baby romaine hearts, perfect size!)

12. Then the T + salt and pepper!

13. Optional: Top with another piece of bacon-bread or get down with the open faced bread-less BLT

Either way, I highly recommend sugar-free ketchup for dipping, classic combo!

14. Thank me later for this amazing low-carb hack. JK, I didn’t invent the bacon weave, but I thank whoever did!


Nutrition: 

For top and bottom “bacon bread:” 334 calories (13 p, 3 c, 30 f)

For open faced/bottom only “bacon bread:” 234 calories (7 p, 2 c, 22 f)

P.S. Find this on MyFitnessPal under “KY Breadless BLT” for easy tracking!

*These macros don’t include sugar-free ketchup, which would add 1 carb per tbsp

*Cooked bacon has less calories than what is listen on many packages (due to the fat that’s removed during cooking)- you often won’t notice it but some bacon packaging has the “cooked calories” beside the non-cooked!


Recommendations: 

This obviously isn’t a super protein rich meal, but it would be a great addition to a dippy egg, or better yet make an egg sandwich and add some cheese if you prefer, a “denver” (cooked omelet sandwich) would be great with this too!

I hope you love this as much as I do, it’s definitely going to be a part of my regular brunch routine from now on!

Tag me in your creations @kyfitnessandnutrition and let me know what you think!

XOXO

Kalli


Plant Based, Low-Carb Cereal (Vegan, Gluten Free, Dairy Free, Keto)

GUYS I love cereal, do you love cereal?

What I don’t love is sugar laden cereal that spikes my blood sugar and makes me feel like crap.

Such a buzz kill, I know.

BUT, the good news is, I have a back up plan, a homemade super simple, sugar-free cereal that is suitable for almost ANY diet plan (or can be adjusted to be!)

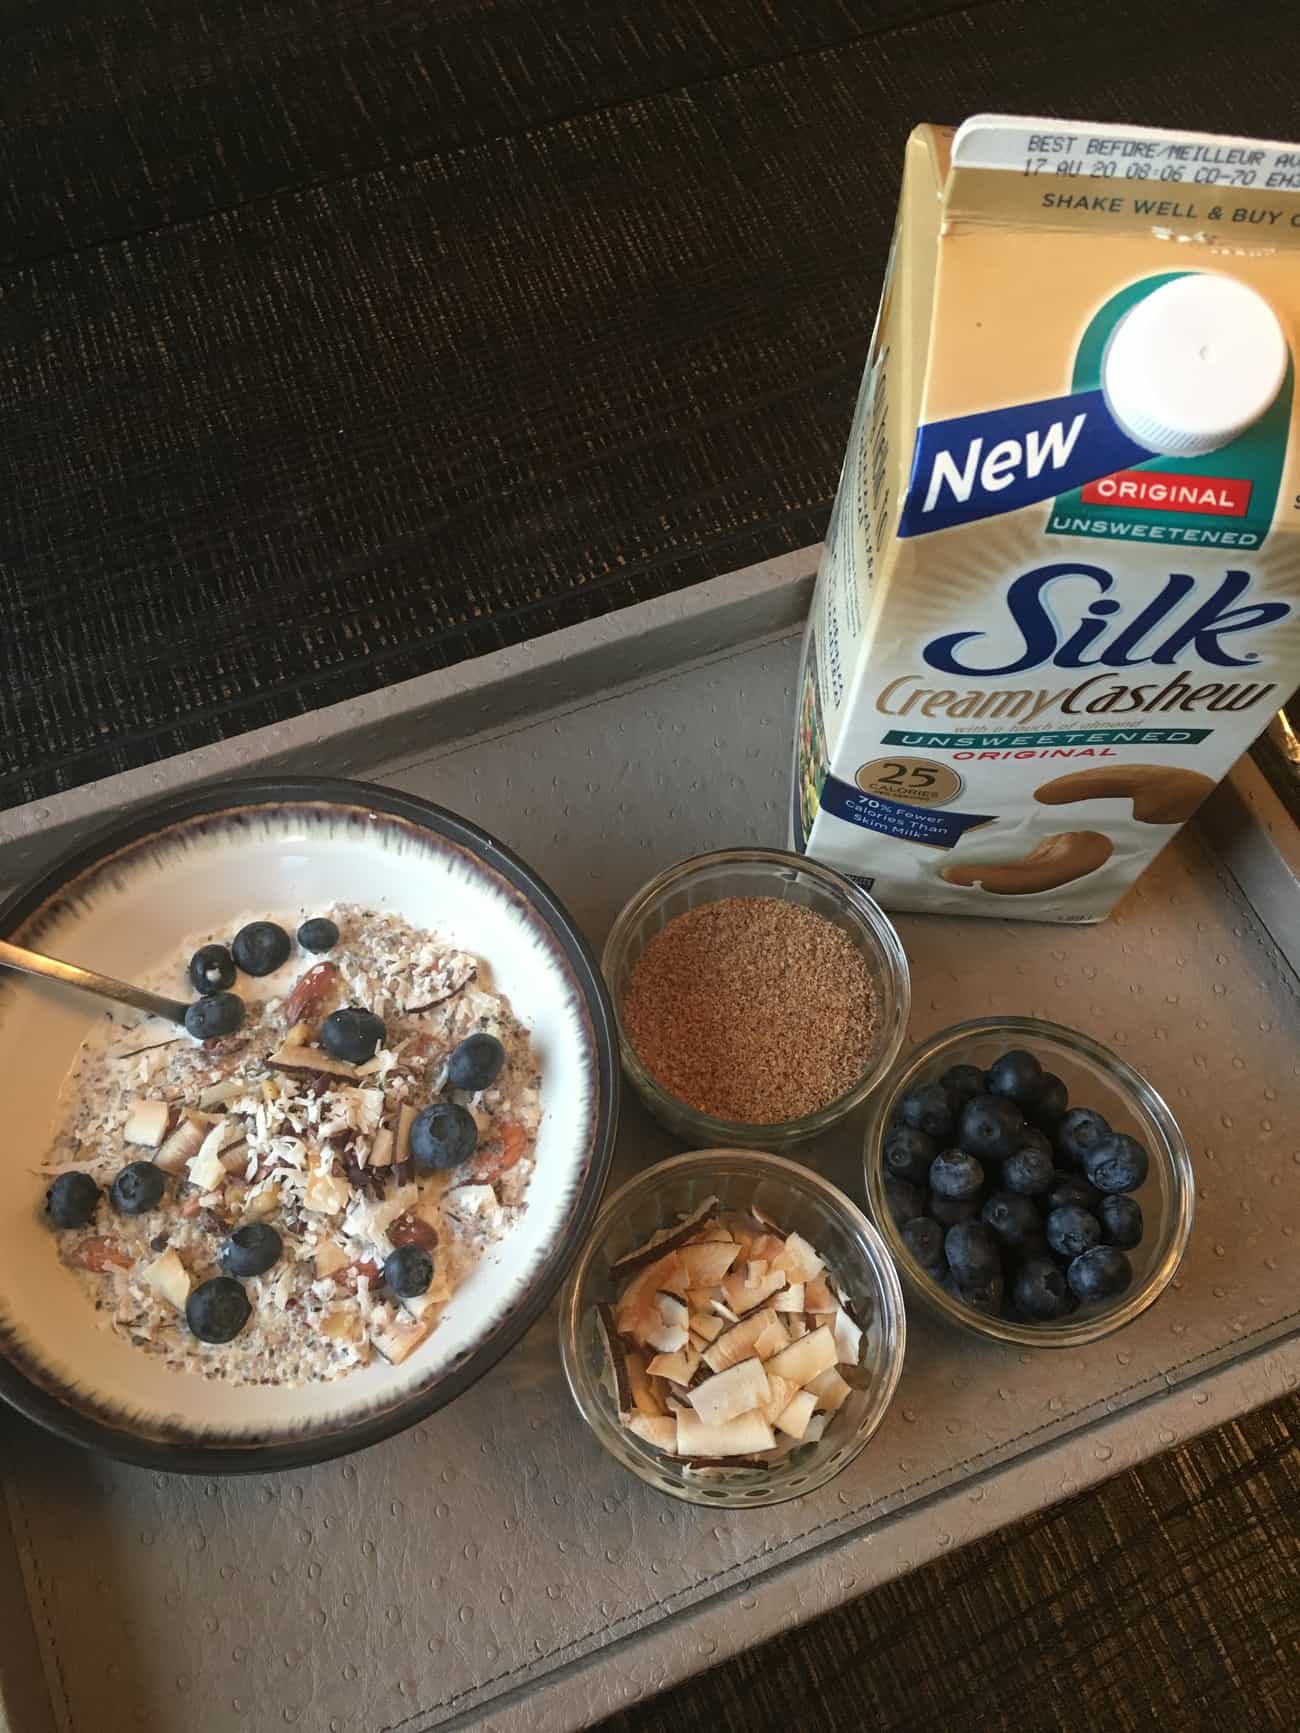
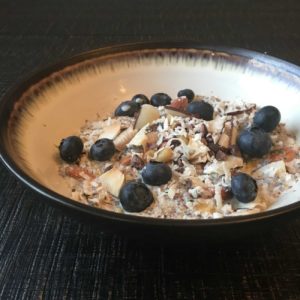
Just look at it!

It’s so filling, packed with nutrients, and full of healthy fats and fiber. What more could you want?!

Ingredients:

-2 tbsp chia seeds

-2 tbsp hemp hearts

-1/2 oz raw almonds

-1 tbsp cacao nibs

-15 g toasted coconut/sugar-free coconut chips (Bulk Barn)

-2 tbsp unsweetened shredded coconut

-1 tbsp ground flax

-Dairy-free milk of choice (I prefer sugar-free cashew milk)

-Optional: berries of choice, other combinations of nuts/seeds (I love walnuts, pecans, pepitas, and sunflower seeds!)

Method:

Mix together, cover with nut milk of your choice, and that is literally it!

I pop mine in the freezer for a few minutes to let it get nice and chilly and allow the chia to thicken up a bit- I also love adding fresh or frozen berries (raspberries especially!) for a bit of added sweetness and flavor the milk with vanilla stevia drops to give that “cereal milk” flavor.

Nutrition: 

This is a calorie dense meal for sure, but it’s a breakfast that will hold you over all day and is more than worth the calories. Think quality over quantity. These are QUALITY calories that are adding so much value to your day!

Calories: 629 (before milk/berries) 49 f, 4 net c (26.7 total, 22.7 fiber), 20 p

You can alter the calories by cutting the recipe in half or play around with other nut/seed combinations!

If you need more than 20 g of protein mix in a scoop of plant based protein (I recommend PEScience vanilla vegan)!

*Find this recipe on MyFitnessPal under “KY Keto Cereal” to track it easily!

Don’t forget to share your creations with me- tag me on Instagram @kyfitnessandnutrition

Enjoy! XOXO

2 Ingredient Peanut Butter Cookies! (Low Carb, Keto Friendly, Paleo, Grain Free, Gluten Free)

PB cookies are a classic, BUT usually not something we can eat day to day and still stick to our health and fitness goals.

Good news, these PB cookies can totally be worked into any diet (if you’re peanut free sub nut or seed butter of your choice) & they won’t leave you feeling the cookie regret afterwards.

Not only are they “diet-friendly,” they are a breeze to whip up and you likely have  everything you need on hand!

(If that’s not an excuse to make cookies, I don’t know what is!)

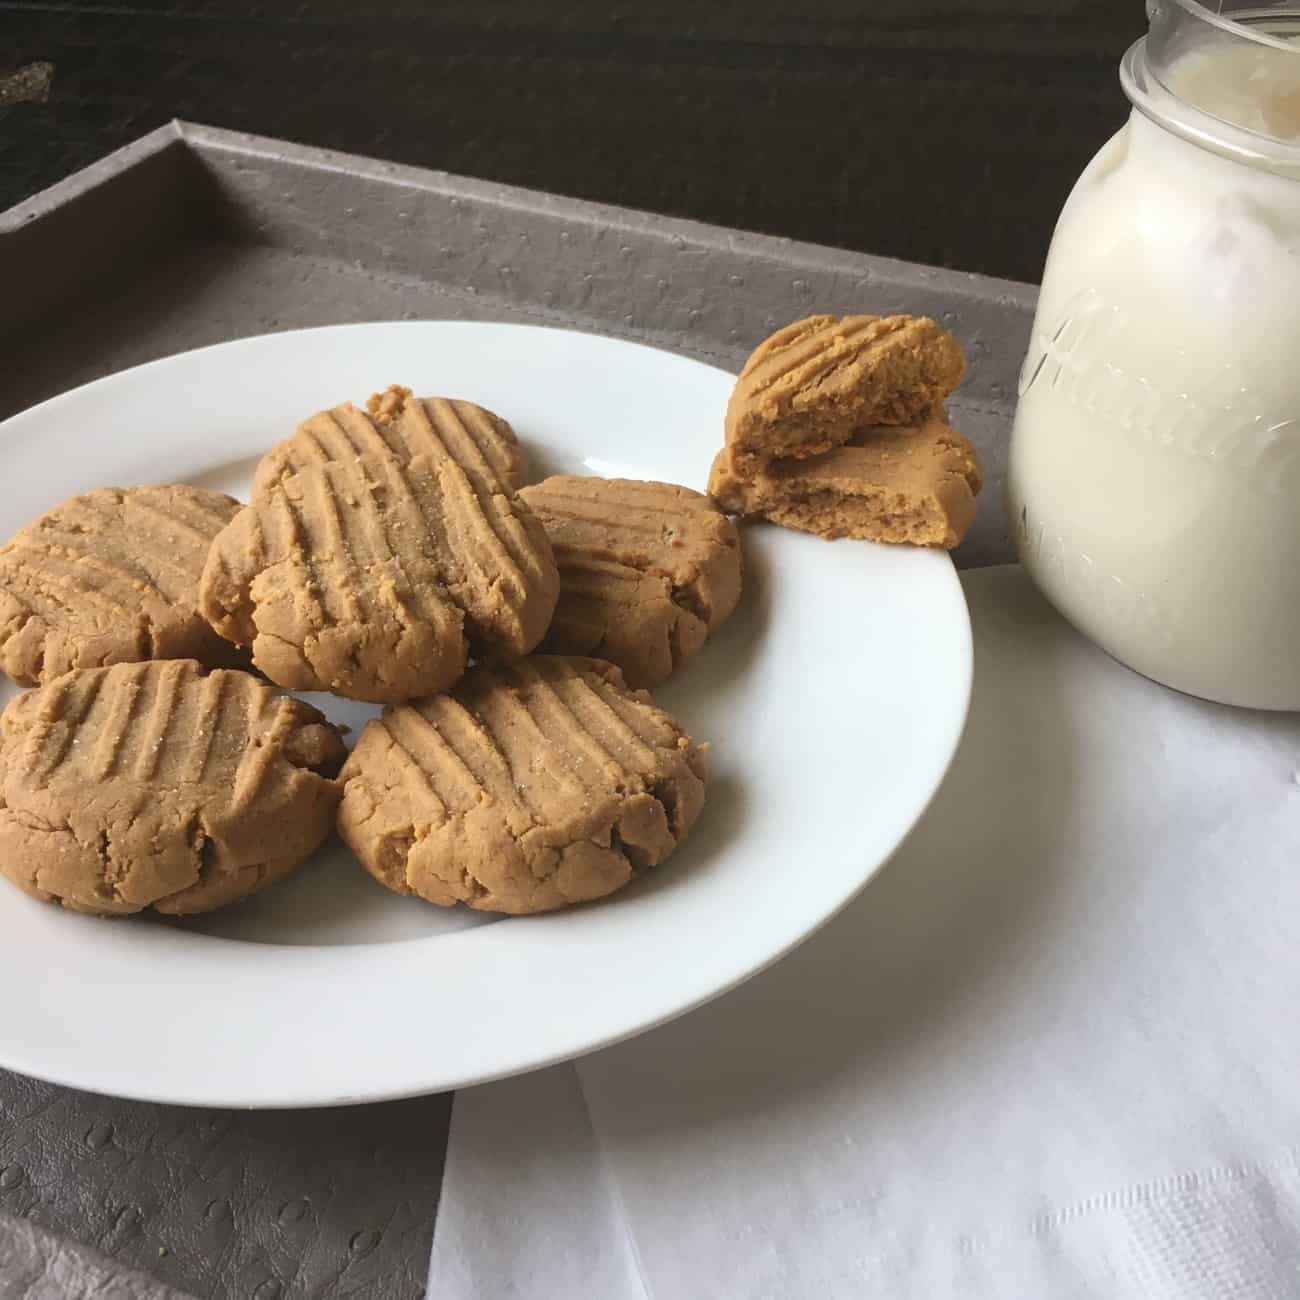
Look at these babies!

P.S. Highly recommend a side of cashew milk with vanilla stevia drops, so good

Ingredients

-1 cup natural peanut butter (or alternative nut/seed butter of your choice)

-1 whole egg

Those are the “needs” for this recipe, from there you can add

-salt (to taste)

-stevia (or sweetener of your choice- to taste)

-vanilla to taste

-add ins: optional!

Method:

Mix nut butter, egg, and remaining ingredients together, form into cookie (I make 10) and bake for 10-12 minutes at 350.

If they are too soft you can continue to bake them, but I recommend under-cooked v.s. over as they will get crumbly!

Store in the freezer until ready to eat- but it is unlikely they will last that long 🙂

I love them straight out of the freezer!

Nutrition: 

Find this recipe on MyFitness Pal under KY 2 Ingredient PB Cookies

Recipe makes 10

For 1/10 cookies:  151 calories , 11.7 g fat, 4.8 c  (1.6 fiber), 7 protein  

*to lower the carb count choose a lower carb nut butter of your choice*


Don’t forget to tag me in your creations @kyfitnessandnutrition

Happy Baking! XO 

Cured Egg Yolks | Bonus: Zucchini Pasta Recipe

We’ve all had cured foods like deli meats and pickles, but have you ever had a cured egg yolk?

Probably not, because it sounds a little crazy, but it’s a great addition to salads, pastas, or as a snack and so easy to prepare!

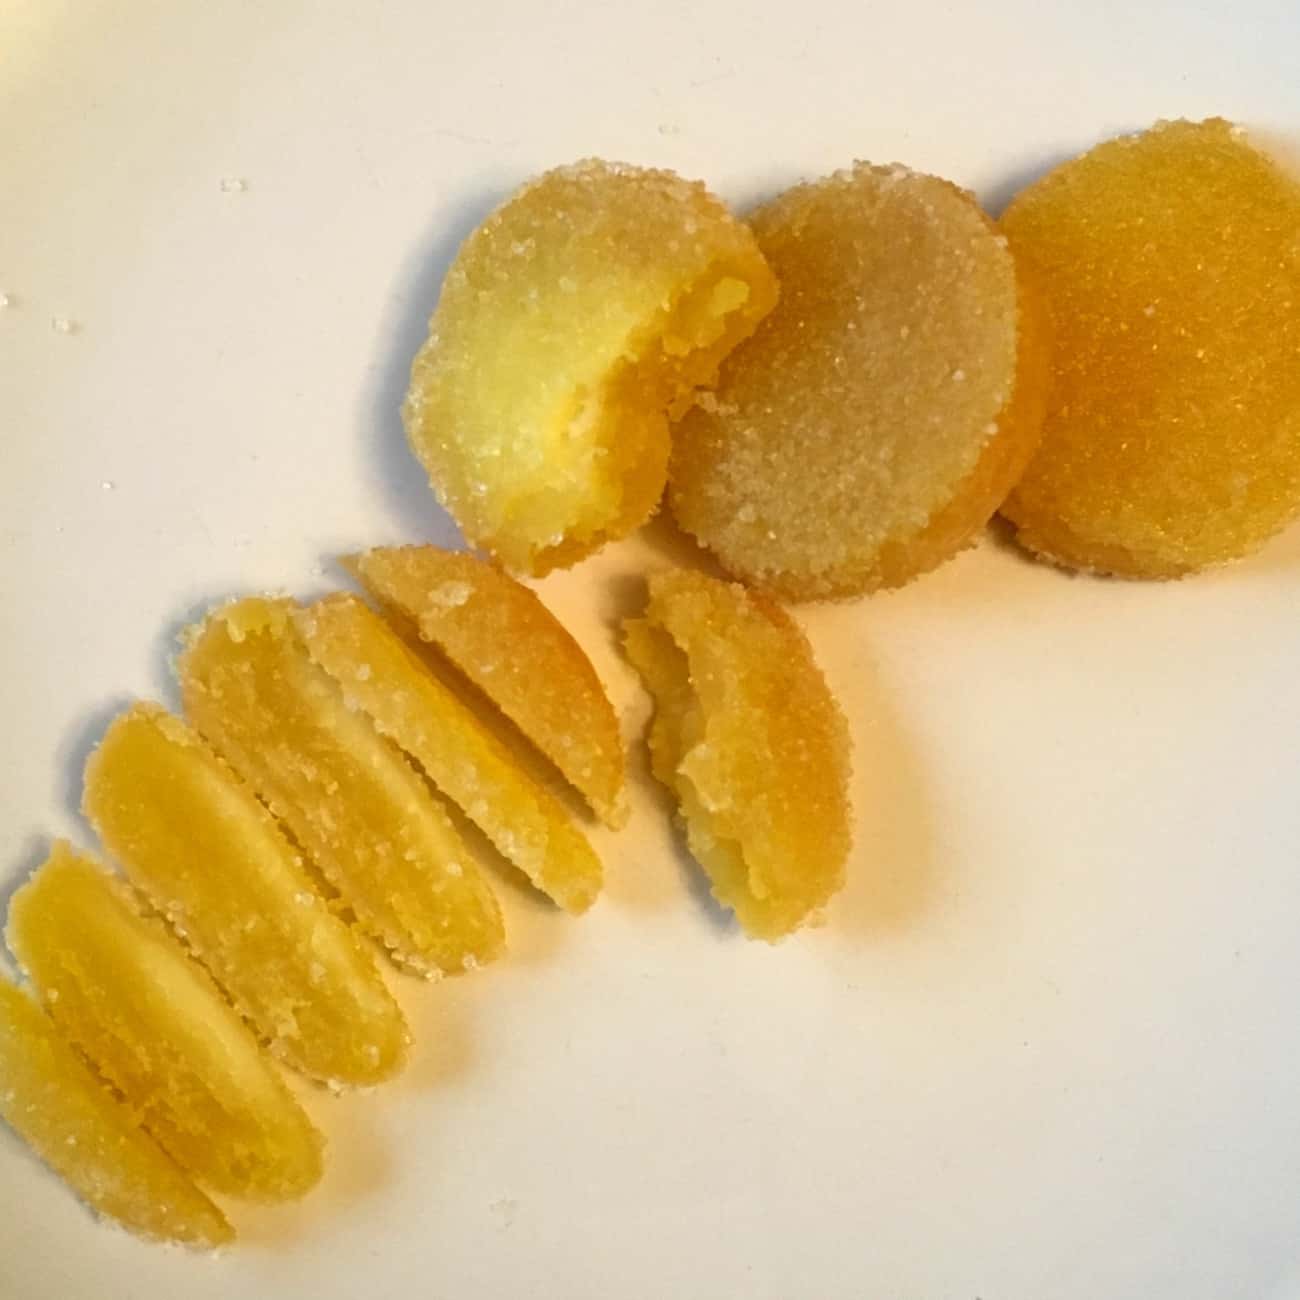
Here’s what they look like after curing- crazy right?! They look (and feel) a lot like fuzzy peaches IMO.

Here’s what I did with them the first time I tried them!

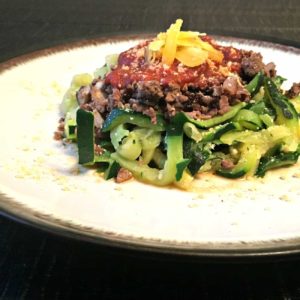
I added them to a quick and easy zucchini pasta (I will include this recipe below), they have a rich nutty, almost cheesy flavor and made a great flavor addition- not to mention I think they make it look a little fancy 😉

Cured Egg Yolks

Ingredients:

-whole eggs

-loose salt (as in not in a grinder as you need a bunch!)

Method:

  1. Separate yolks from whites- save whites for an omelette or something more exciting (meringues!)
  2. Cover a plate with salt (size will depend on how many yolks you want to cure at a time)
  3. Create a small nest in for each yolk with the back of a spoon, place yolk in said nest
  4. Cover the yolks completely with salt
  5. Leave uncovered in your fridge for 2-7 days (the longer they dry out in the fridge the less oven time they need)
  6. When you’re ready to finish the curing process (a quick pop in the oven) gently remove the yolks from their salt
  7. Bake the now hardened yolks for 2-4 hours at the lowest temperature your oven goes (170 for me)
  8. Once the yolks have dried out and hardened to the texture you prefer, remove, and they are ready to use!
  9. Grate them over salads and pastas like you would cheese and keep them cool in the fridge for up to 4 weeks

Nutrition: (using large egg yolks) for 1 cured yolk

54 calories (4.5 f, .6 c, 2.7 protein)

Bonus Recipe: Zucchini  Pasta

I feel bad even calling this a recipe, because it really is so simple, but here goes!

Ingredients:

-zucchini

-ground meat of choice (optional)

-jarred or homemade tomato sauce (I use Classico Tomato basil in a pinch)

-veggies of choice

-cured egg yolks (optional, but recommended)

-cheese or nutritional yeast (again, optional, but worth it)

-spices of choice

-oil of choice (I use olive)

Method:

  1. Spiralize zucchini into noodles (you can also buy pre-noodled or shave into thin strips with a veggie peeler)
  2. Cook protein of choice with veggies and spices (I like basil and any Italian seasonings in this)
  3. While your protein cooks cook zucchini noodles through in a pan with olive oil and garlic
  4. Drain zucchini noodles well (I use a strainer and squeeze well with paper towel to get the excess water out)
  5. Season noodles and protein to your preference
  6. Add sauce of your choice, mix together, top with grated cured yolk and cheese of your choice!

That’s all it takes and it is SUPER quick and easy to throw this meal together, a great low-carb option for anyone.


If you make these recipes don’t forget to tag me on Instagram @ifbbprokyfit so I can share your creations! 

Happy, healthy cooking! XO

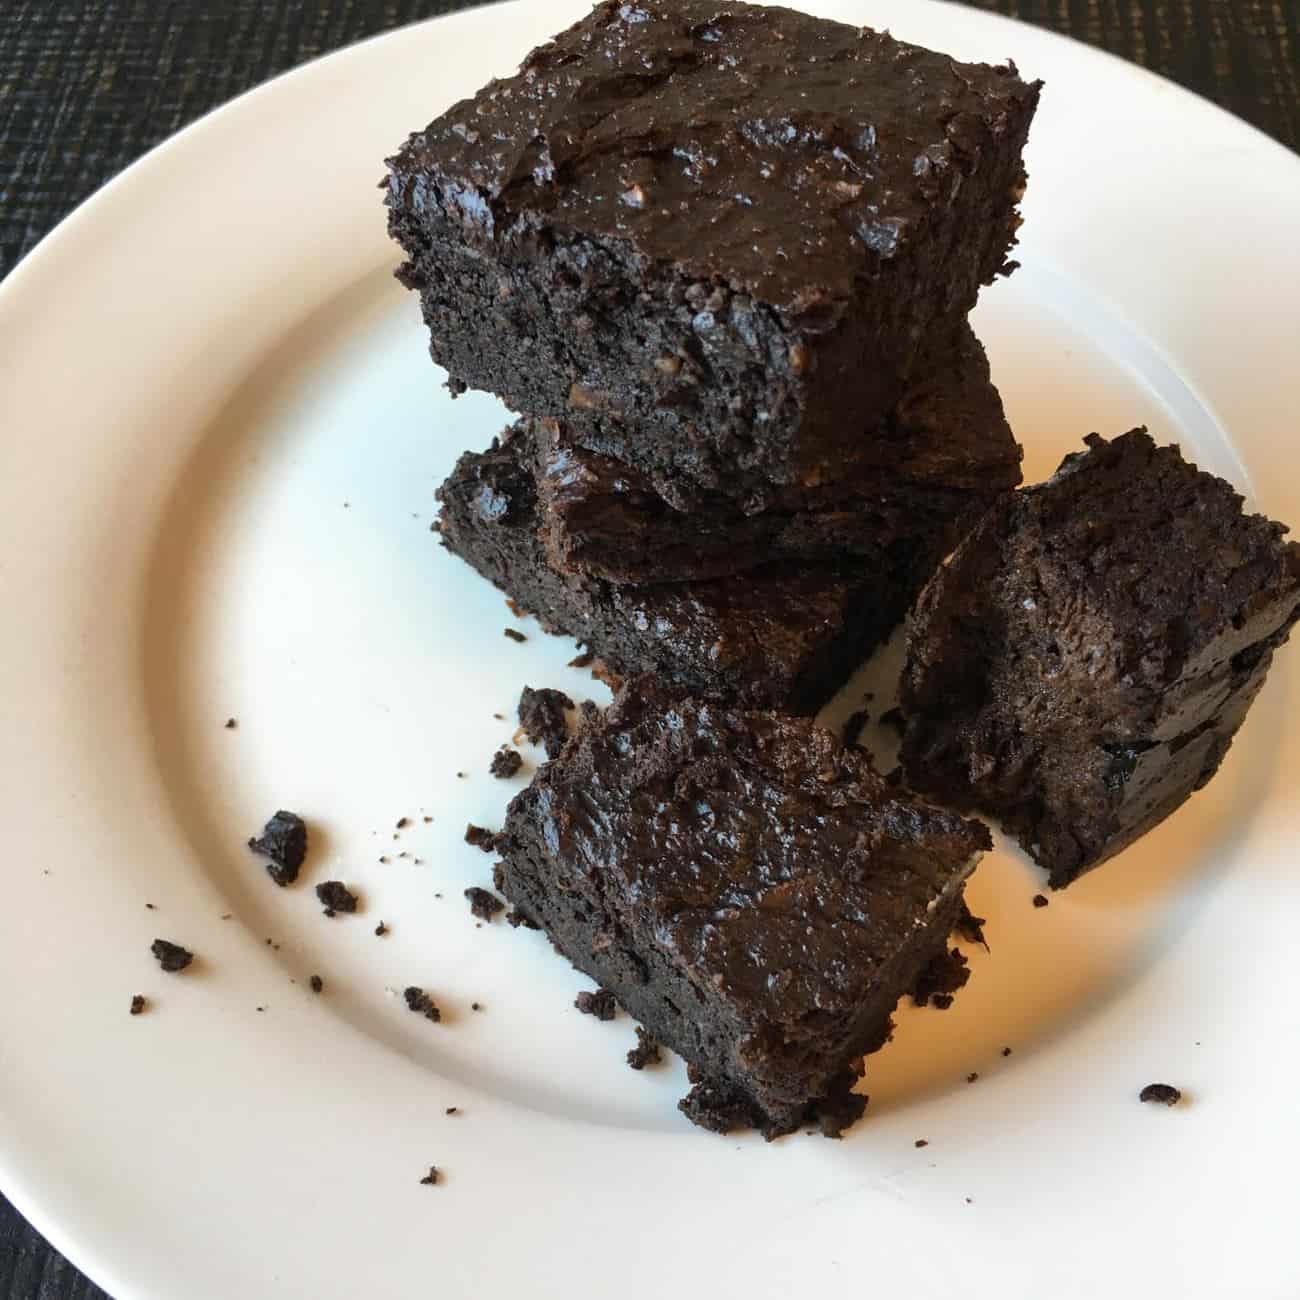
Avocado Brownies (gluten-free, low-carb, keto-friendly, and no- you can’t taste the avocado!)

I love chocolate. I also love avocado.

I usually don’t  like the two together, BUT avocado ice cream and now avocado brownies are an exception to that generally safe to follow rule.

The avocado creates a great moist base for this low-carb, keto-friendly, paleo-friendly, gluten-friendly, basically all things friendly, high flavor brownies that can fit into almost any nutritional approach.

Don’t let the avocado scare you, I promise you won’t be able to taste it!

Here’s what you need!

Wet Ingredients: 

-2 whole ripe avocados (the softer the better, but still green of course)

-1 tsp vanilla

-4 tbsp cocoa powder

-3 tbsp coconut oil

-2 whole eggs

-100 g 100% Baker’s chocolate (you can adjust this to a lower cacao if you prefer, it will increase carbs)

-Optional: shredded coconut, sugar-free chocolate chips, or nuts of choice

Dry Ingredients: 

-90 g almond flour

-1 tsp baking powder

-1/2 tsp salt

-1 cup artificial sweetener or equivalent stevia (sweeten to your liking, you will need a lot of sweetener to cut the bitterness of the cocoa/dark chocolate, but it’s totally worth it)- I’m a batter tester, so sue me! (P.S. in my 26 years I’ve yet to acquire salmonella… knock on wood) so I recommend tasting/sweetening as you go!

I personally adjust the salt as I go too, the salt enhances the sweetness and chocolate flavor!

Optional Toppings: 

Coconut Cream: put a can of full fat coconut cream in the fridge overnight, open the can and spoon off the thick cream on top- mix smooth (optional add vanilla/sweetener) and top your brownie, I like it straight up!

Almond butter (or nut butter of choice): make your own or use jarred, to thin it out mix a bit of coconut oil

Cream Cheese Icing: cream cheese, vanilla, and sweetener make a super easy and amazing icing for this!

Whipped cream: classic- full fat whipping cream with vanilla and stevia, whip it up and try not to eat it all 😀

Naked- still a great choice, they are moist enough that they are totally delish on their own!

Method: 

  1. Pre-heat oven to 350 degrees F
  2. Peel/spoon avocados into food processor, blend until as smooth as possible
  3. Melt chocolate and blend with avocado along with other wet ingredients
  4. Mix dry ingredients into wet, blend until well incorporated and lump free
  5. Mix in optional add ins (shredded coconut, sugar-free chocolate chips, and/or nuts)
  6. Top with salt and bake for 25-30 minutes until cooked through
  7. Top with your choice of toppings
  8. Devour! I recommend COLD they get even more fudg-ey and delicious after a day in the fridge!

Store in the fridge and ENJOY!

Adapt it as you go, I like lots of salt and  sweetener and top them with something different every time depending on how I feel.  Pro Tip: Have a glass of iced cashew milk with vanilla stevia drops on the side!

You’re welcome! 😉


Nutrition (for brownies only) – cut into 16 pieces: 

133 calories  (srsly, for a brownie? I’ll take it!)

10.5 f, 6.5 carbs (4.5 fiber) for 2 net carb, 3 protein 


Please Enjoy! Let me know if you like them and tag me in your creations on Instagram @ifbbprokyfit

XO

Kalli

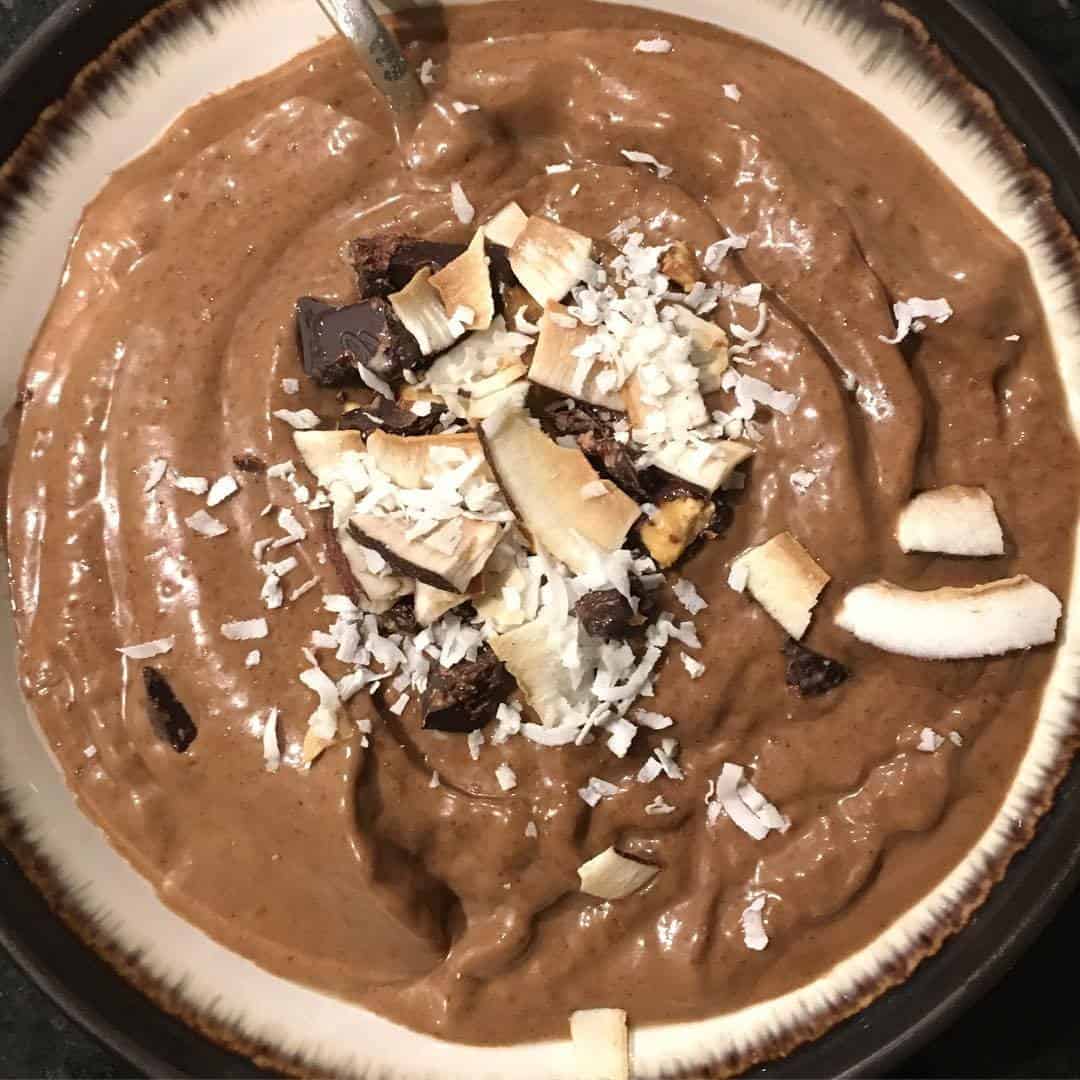
Avocado Ice Cream (Sugar-free, dairy-free, paleo, keto friendly)

Ice cream is by far one of my favorite things, especially in the summer.

However- dairy bloat, sugar slumps, and crazy amounts of calories to enjoy said ice cream are not!

Cue avocado ice cream!


You don’t even taste the avocado, it just adds a thick, creamy, rich base for your “nice-cream” and makes for a great dupe!

Not only is this recipe a great low calorie, sugar-free treat, it’s a nutritional powerhouse packed with healthy fats and antioxidants from the cacao powder and can be bumped up even more with the toppings you choose!

Ingredients: Makes 1 Serving 

-1/2 of a large avocado or 100 calories avocado (frozen or fresh)

-3 tbsp cacao powder (adjust to preference)

-stevia to taste

-ice (about 1 cup)

-sugar free cashew milk or non-dairy milk of choice

Method:

Add avocado to the blender, followed by cocoa powder, stevia, and ice. Add your choice of liquid to blender (bring almost to the top of ice) and blend until smooth. That’s it! I just a bullet sized blender which is perfect for 1 serving. Top with your favorite healthy toppings like almond butter, toasted coconut, shredded coconut, and cacao nibs!

*Tip: for chocolate mousse omit ice and lessen the liquid quantity, blend and voila!*

Nutrition: 

312 calories (before toppings)

24 f, 6 p, 2 net c (18 c, 16 f)

Let me know if you try it!

Tag me at @ifbbprokyfit

xo

Chocolate Covered Cacao Beans (Low Carb, Low Sugar, Keto Friendly)

We all love chocolate. And all love that we can justify our chocolate addictions as being good for us while we eat it!

The less-processed the chocolate the better it is for you and the more beneficial properties provided!

The raw cacao bean is the least processed form of chocolate, but many find it too bitter to consume on it’s own.

Cue chocolate covered cacao beans (A.K.A. chocolate covered chocolate… because chocolate)

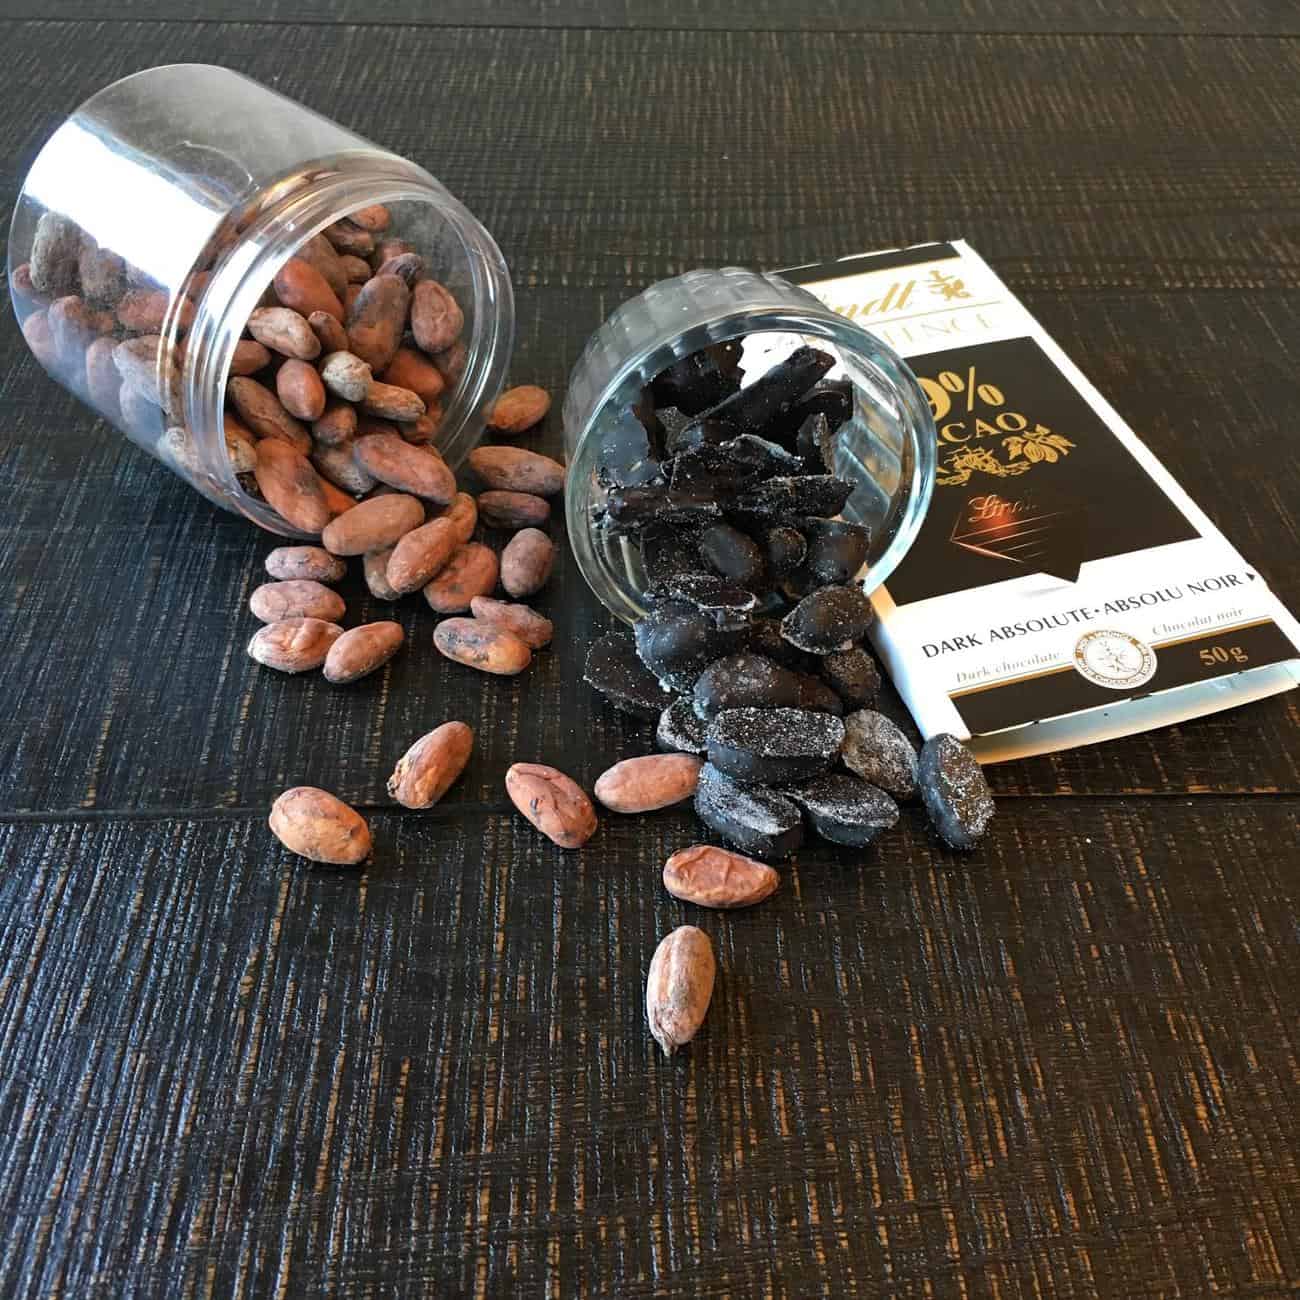
Left to right we have the raw form, the chocolate covered form, and an example of the 99% chocolate I used to coat these little beauties in. They couldn’t be easier and they are a perfect way to lessen the bitterness of the raw bean without damaging the amazing health properties provided by chocolate in its raw form.

Ingredients:

-raw cacao beans (available at most health food stores, mine are from Soul Foods here in Saskatoon)

-dark chocolate bar of your choice, I opted for 99% dark chocolate for the lowest possible sugar content (London Drugs)

-salt (pink Himilayan)

-powdered stevia

-optional: cinnamon/vanilla/cayenne/instant coffee

Method:

It really couldn’t be simpler.

  1. Melt chocolate- I did this in a microwave in 20 second increments stirring in between
  2. Dip beans in melted chocolate, lay on parchment paper to cool
  3. While cooling and  with the chocolate still wet, sprinkle with Himalayan salt, stevia and if you like spices of choice
  4. Pop in the fridge or freezer to set and voila!

*I recommend the 99% chocolate as there is next to no sugar in it, but due to the bitterness of it recommend adding the sprinkle of stevia on top. The stevia/salt help to cut the bitterness and add extra benefit with more cacao and minerals!*

If the 99% is too bitter for you start with something between 70-75% and work your way up. Your taste buds will eventually adapt to the extremely dark chocolate and you won’t miss the added sugar. These are a great grab and go treat, leave them in the freezer to pop a few with a coffee on a summer day or add them to a homemade trail mix!

Benefits of Raw Cacao Beans

Superfood, to say the least!

-a true anti-depressant- cacao beans provide dopamine and serotonin, one of the reasons chocolate is a “comfort” food

-anti-oxidant power house (much more than green tea, red wine, and blueberries- cacao is where it’s at!)

-rich in polyphenols, beneficial for heart health

-full of magnesium & iron (the highest level of iron available in a plant source!)

-epicatechin- aids in insulin sensitivity, weight loss, & physical performance

Leave your cacao raw!

The more raw the better- opt for cacao powder v.s. cocoa powder

(cocoa means it’s been heated which can remove the beneficial enzymes available in chocolate!)

Try them out and let me know what you think! 

Tag me in your chocolate creations @ifbbprokyfit

Enjoy!

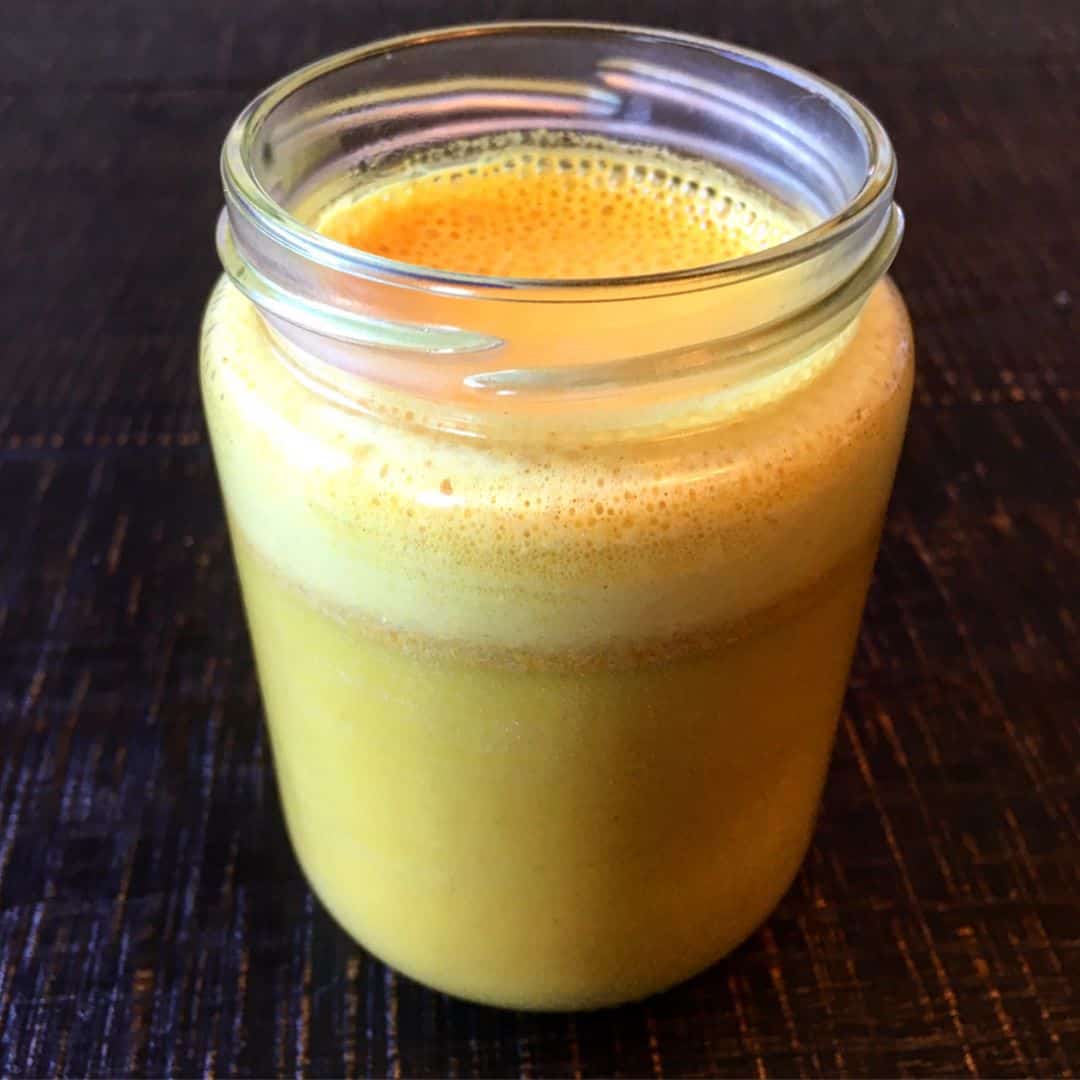
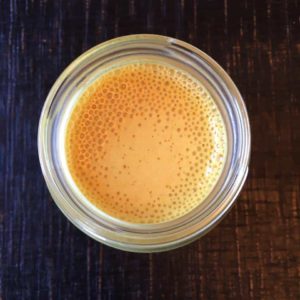
Golden Milk (Turmeric “Latte”)

Hopping on the “golden milk” trend and couldn’t be happier about it!

I know it sounds crazy, but it’s SO good and so good for you!

Ingredients: 

  • 1 cup unsweetened cashew milk (or non-dairy milk of choice)
  • 1/2 tsp turmeric
  • 1/4 tsp ground ginger
  • 1/4 tsp ground cinnamon
  • 1 tsp coconut oil or MCT oil
  • pinch of cracked black pepper
  • stevia to taste (I prefer stevia drops)

Method:

  1. Heat milk of choice to boil
  2. Add spices, coconut oil, and sweetener
  3. Blend until frothy
  4. Re-warm if needed & ENJOY!

The spices in golden  milk have so many benefits including anti-inflammation, anti-oxidants, increased ability to absorb and digest glucose to name a few. Make sure you add the coconut oil or use a full fat coconut milk as the base of your golden milk and don’t skimp on the black pepper as both ingredients enable your body to absorb the curcumin in the turmeric which is the most beneficial ingredient in the golden milk!

Calories: *using 1 cup sugar free cashew milk, not allocating for spices* 

68 calories (7 fat, 1 g carb) 

Let  me know if you try it!

xoxo

KY


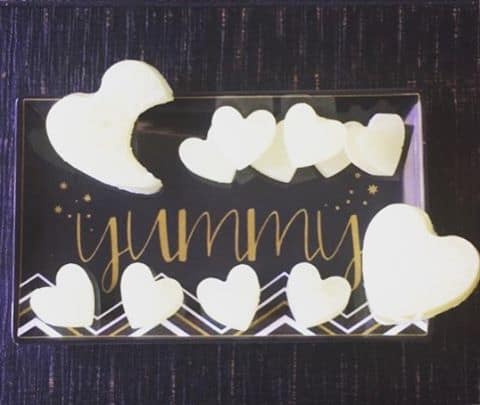
Sugar-Free BCAA/Amino Gummies

Such a good diet-hack for anyone who has a sweet tooth- replace your regular gummie candies with this high protein, sugar-free version!


Ingredients:

  • 3 envelopes of plain gelatin (I use Knox)
  • 1 scoop of your favorite Branch Chain Amino Acid (BCAA)
  • 1/2 cup boiling water

Method:

It really couldn’t be easier. Dissolve BCAAs and gelatin into boiling water, transfer to silicone candy molds, pop in the freeze or fridge to set and that’s it!

Calorie Count:

This entire recipe has only 50 calories, all coming from protein (12G!)

Have your candy and eat it too!

Don’t forget to tag me in your creations @ifbbprokyfit

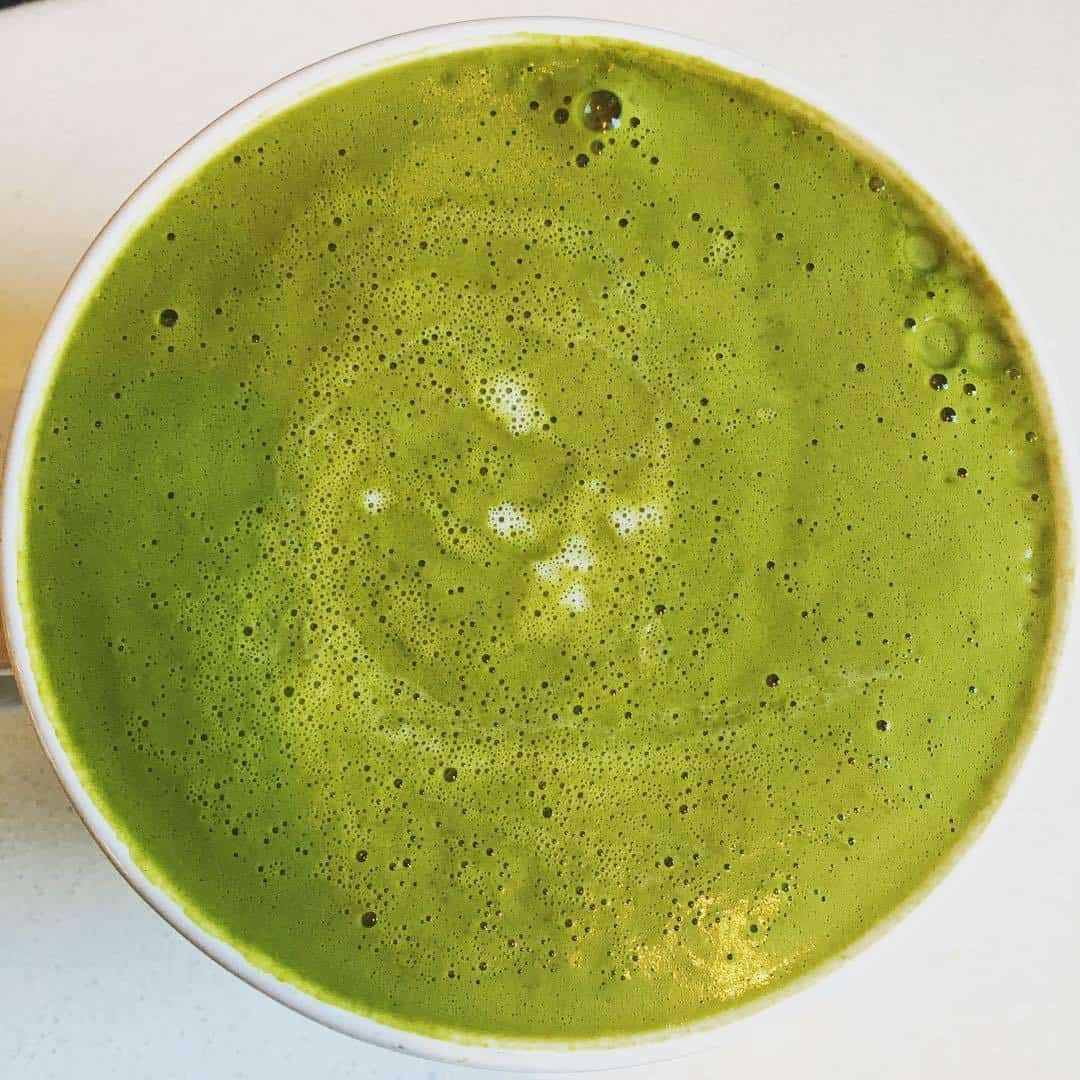
Dairy-Free, Sugar-Free Matcha Green Tea Latte

Starbucks who?

Save your $ and your calories by whipping up this super easy and delicious at home version of your favorite green tea latte!


Ingredients:
  • matcha green tea powder (Bulk Barn)
  • dairy free milk of choice (I prefer sugar-free almond or cashew milk)
  • 0 calorie sweetener of choice (optional, but I prefer stevia)

Method: 

  1. Mix together 1 tsp of matcha powder with 1 cup of your milk of choice, sweeten to taste
  2. Heat in the microwave or on a stove top (or leave cold if you prefer an iced latte)
  3. Optional, but fun: froth 1/4-1/2 cup of your milk choice to add on top (I use a hand frother from Wal-Mart!)

So simple and so satisfying!

You could totally make this into a protein latte by mixing the 1 cup  of milk with your favorite protein in advance!

Superfoods Chia Pudding Recipe!

I asked you to VOTE for what recipe should be included in my November newsletter and the winner was, CHIA!

I have been obsessed with chia pudding lately- you may have noticed.

It’s so satisfying and a great way to get some extra greens into your diet while satisfying your sweet tooth at the same time!

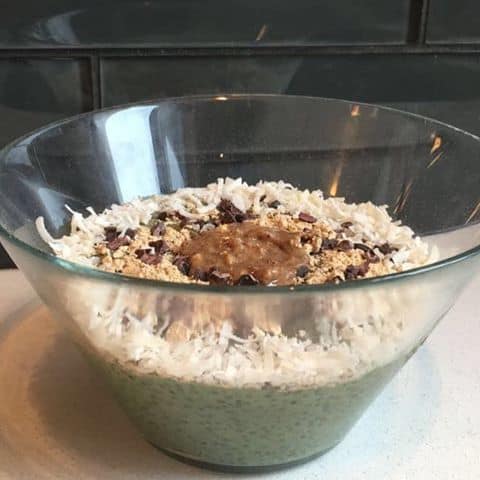
Basically the epitome of #health today  Started my day off with 15 mins of rise yoga ☀️ Tried my first spin class at @rydeyxecyclestudio (courtesy of @sugi.kana!) ‍♀️ picked up a bullet proof coffee from Hygeia & bought all the keto foods ☕️ Stopped in at @hercs_sk  to check out the Black Friday sale annnnd currently enjoying a green chia pudding made with vegan protein and topped with cacao nibs, peanut flour, shredded coconut, and almond butter


Ingredients: (makes one serving) 

  •  3 tbsp (36 g chia seeds)
  • 1 cup liquid of your choice (for lower calorie and dairy free I recommend sugar-free cashew milk)
  • 1 scoop of your favorite greens powder (I recommend NFA Cool Cappuccino)
  • Optional: cocoa powder (for extra chocolate/less greeny flavor), 0 calorie sweetener, 0 calorie syrup
  • Optional: protein powder (if you prefer this as a meal or breakfast feel free to add in your favorite protein!)

That’s IT for the base of your pudding- and actually, all you REALLY need for the base of the chia pudding is the chia and the liquid, everything else is just dependent on your flavor profile preferences and TOPPINGS (the best part)

But, since the focus of this recipe is #health, include the greens and feel good about your healthy choice!

Method:

  1. Mix chia seeds, cashew milk, and greens powder together (optional: shake in a shaker cup for easy mixing!)
  2. Let sit in an air tight container for a few hours or overnight, the longer it sits the more liquid the chia absorbs and the more “pudding”-like the mixture will become
  3. When you’re ready to eat, give it a stir, add in any extra sweetener or flavorings you might like, and top!
  4. For more “super foods” boostin goodness top with cacao nibs, matcha powder, pistachios, berries, and almond butter (100% almonds, no added sugar necessary!) Some of my other favorite toppings include peanut flour and coconut flakes, but you can include any of your favorite fruits, nuts, and seeds as great toppings!

It’s that simple!

If you find the taste of the greens is overpowering I recommend adding 1-2 tbsp of cocoa powder, a bit of cinnamon, and some extra 0 calorie sweetener and you’ll hardly notice the greens are there! #healthiswealth

Nutritional Information (not including toppings and using 1 cup of sugar-free cashew milk)

230 calories: 10 g protein, 16 g carbs (14 fiber), 14 g fat

On their own chia seeds are already an amazing nutritional powerhouse loaded with health omega 3 fats, protein, and fiber, but add a scoop of your favorite greens powder and top them with your favorite healthy add ins to boost the value of this healthy pudding even higher!

Don’t forget to tag me in your creations @ifbbprokyfit and share them on Instagram because sharing is caring! 😀

Item added to cart.
0 items - $0.00